Login to Webmail
Visit your webmail page at www.yourdomain.com/webmail and login using your full email address and password.
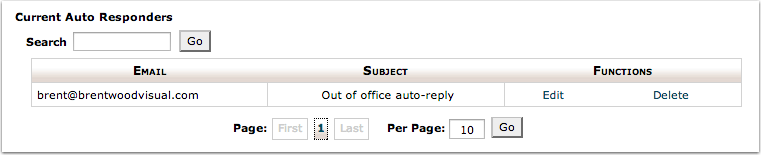
View Auto Responders
Once you're logged in, you'll see several options at the bottom of the page. Click on Auto Responders to configure your auto-reply.

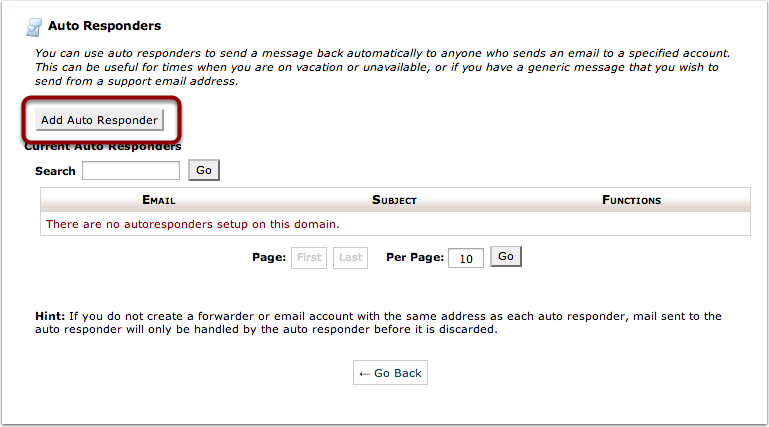
Add a new Auto Responder
Once you're on the Auto Responders page, you'll see a list of any responses currently set up. Click the Add Auto Responder button to create a new one.
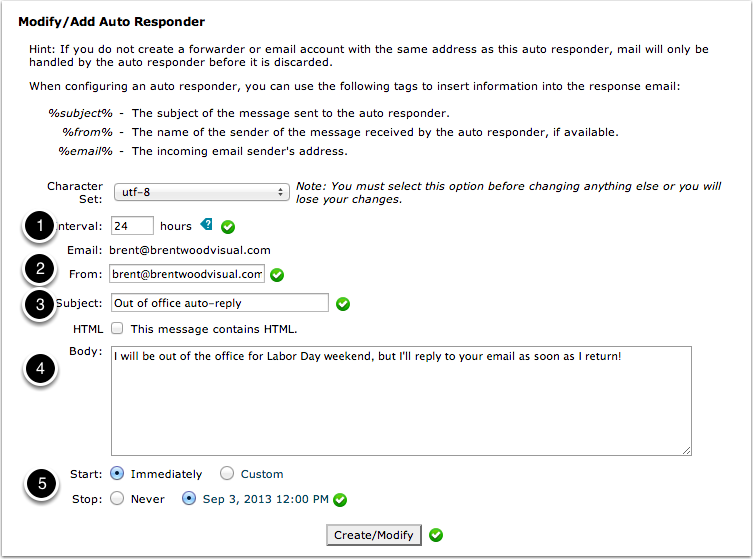
Set up your Auto Responder
You have several options when configuring your auto-responder.
- Interval allows you to set how often a sender should receive a response from the auto-responder. For instance, setting the interval to 24 hours means that a sender will only receive a response once a day.
- From should be set to your own email address.
- Subject contains the subject line of the email you want sent. You can use the tags listed at the top of the screen to add additional information. For instance, entering "Sorry %from%, I'm on the beach!" would send a reply to your friend Charlie saying "Sorry Charlie, I'm on the beach!".
- The body of the message you want sent out.
- Start and end dates for your auto-responder. Use this to set up the responder only for the duration of your time away so that you don't have to remember to turn it off when you get back.
When you've finished setting up your message, click Create/Modify to activate your auto-responder.
Confirm your responder
Once you've clicked Create/Modify, you'll see a confirmation screen, and will then be returned to your main Webmail interface. Click on Auto Responders again to confirm that your message was added successfully.
If you didn't set up a Stop Date, you can delete the message manually from this screen by clicking Delete.